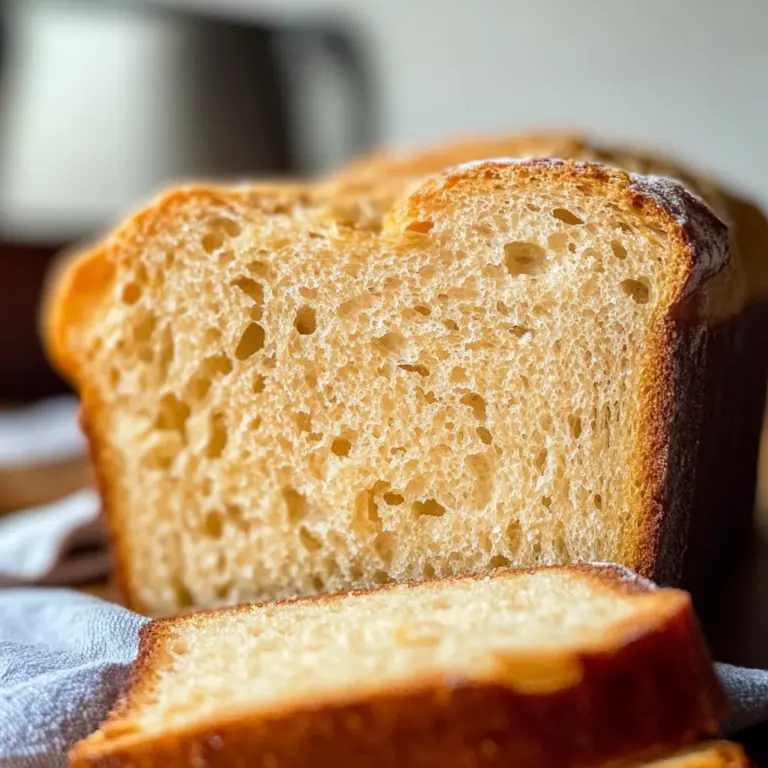
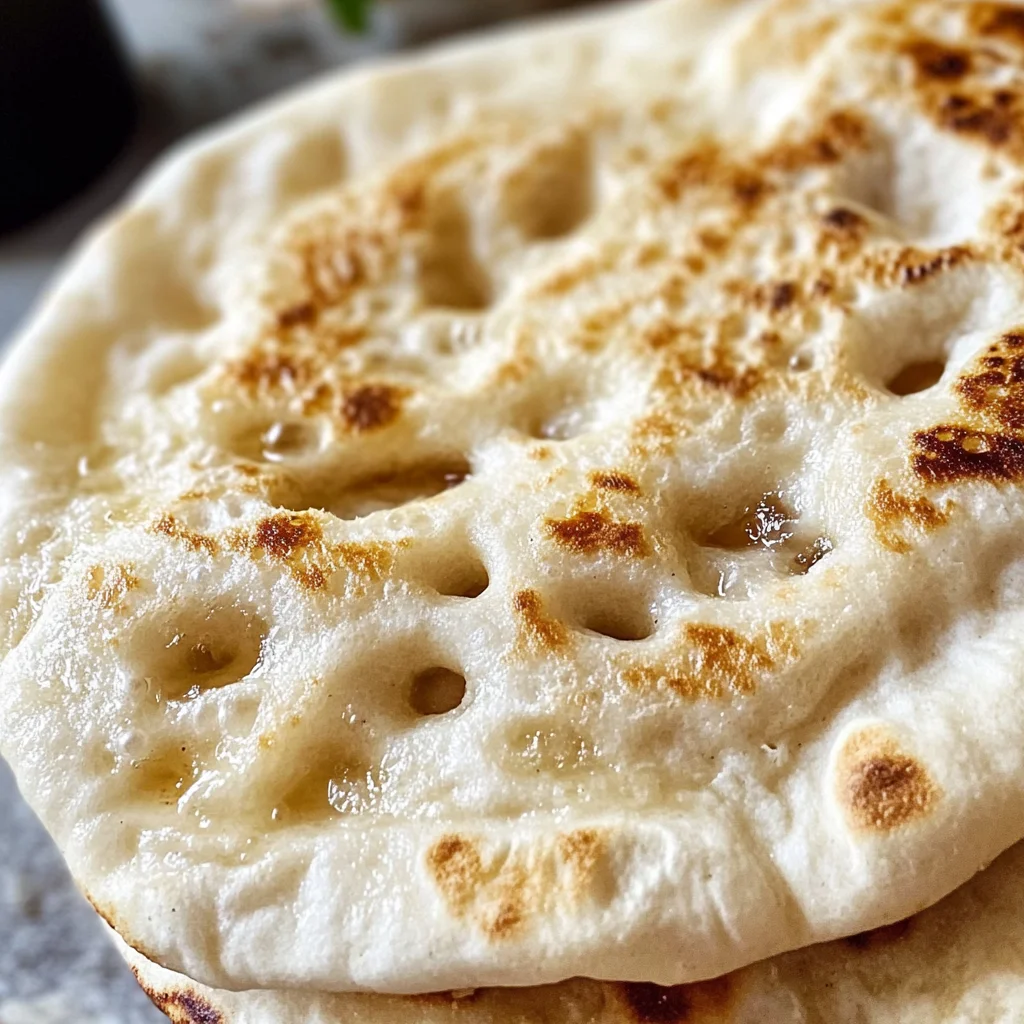
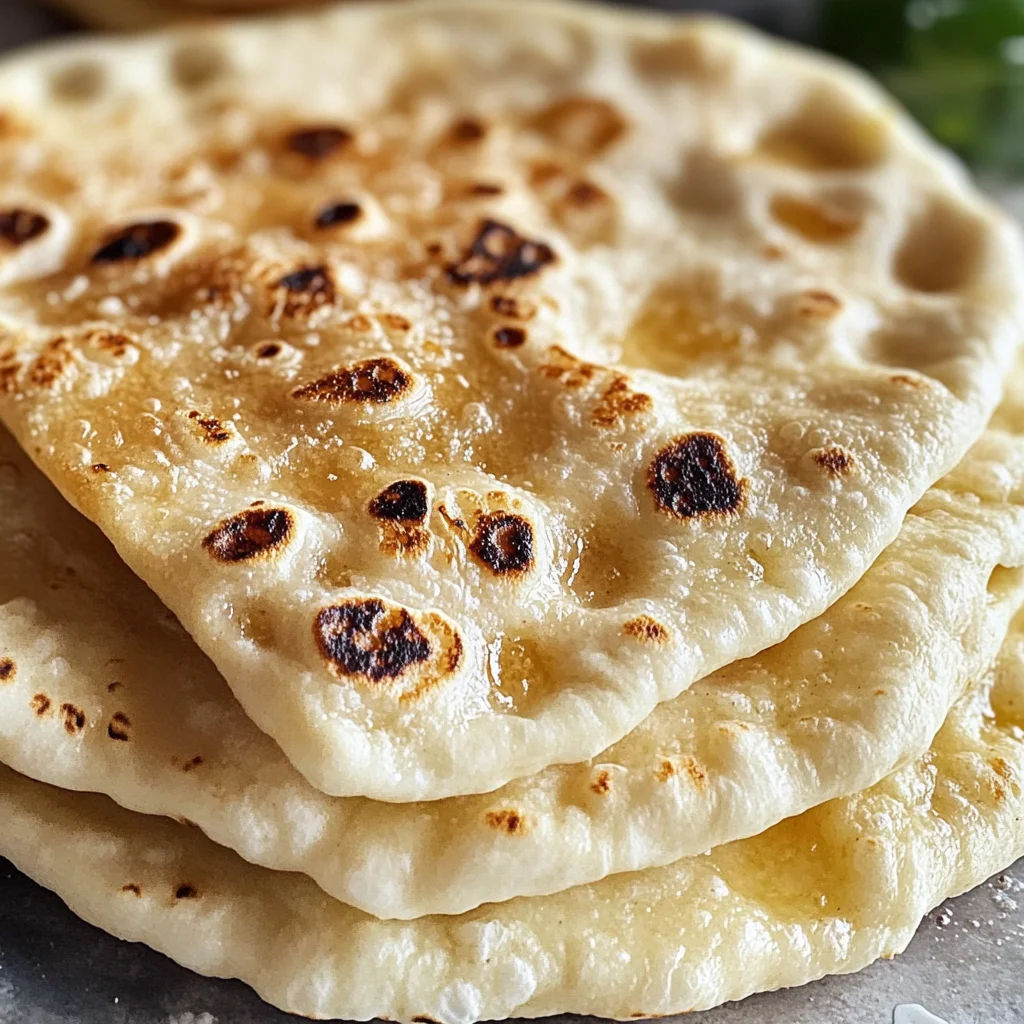
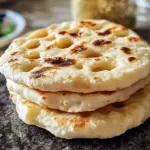
Gluten-Free Pita Bread
This Gluten-Free Pita Bread is a delightful alternative for anyone looking to enjoy soft, airy flatbreads without gluten. Perfect for wraps, dips, or enjoying with your favorite Mediterranean dishes, this recipe is simple yet flavorful. With just a handful of ingredients and minimal effort, you’ll be able to whip up fresh pita bread that rivals store-bought options. Whether for a family meal, a casual gathering, or a special occasion, this pita bread is sure to impress.
Why You’ll Love This Recipe
- Easy to Make: With only five main ingredients and straightforward steps, you can enjoy homemade pita in no time.
- Versatile Usage: Great for wraps, sandwiches, or served alongside hummus and salads; the possibilities are endless!
- Healthy Alternative: This gluten-free recipe allows everyone to indulge without the worries of gluten intolerance.
- Cost-Effective: Making your own gluten-free pita bread can save you money compared to buying specialty breads.
- Delicious Flavor: Enjoy the tender and fluffy texture that complements any meal perfectly.
Tools and Preparation
Before diving into making your gluten-free pita bread, gather your tools to ensure a smooth cooking process.
Essential Tools and Equipment
- Mixing bowl
- Measuring cups
- Measuring spoons
- Rolling pin
- Baking sheet
Importance of Each Tool
- Mixing bowl: A spacious bowl makes it easy to combine the ingredients thoroughly.
- Rolling pin: Helps achieve an even thickness for your pitas, ensuring they cook evenly.
- Baking sheet: A sturdy surface for baking allows the pitas to puff up perfectly in the oven.
Ingredients
For the Dough
- 3/4 cup + 2 tbsp warm water
- 10 g fresh yeast (see notes)
- 1 1/2 tsp organic cane sugar
- 1 cup white rice flour (see notes for a version with regular flour)
- 2/3 cup tapioca flour
- 2 tsp psyllium husk powder
- 1/2 tsp salt
- 2 tsp oil
How to Make Gluten-Free Pita Bread
Step 1: Activate the Yeast
In a mixing bowl, combine warm water with yeast and sugar. Let it sit for about 5–10 minutes until it becomes frothy. This step ensures your yeast is active.
Step 2: Mix Dry Ingredients
In another bowl, mix together the white rice flour, tapioca flour, psyllium husk powder, and salt until well combined.
Step 3: Combine Wet and Dry Ingredients
Once the yeast mixture is frothy, pour it into the dry ingredient mix along with oil. Stir until a dough forms. It should be slightly sticky but manageable.
Step 4: Knead and Rest
Knead the dough gently on a floured surface for about 1–2 minutes. Then cover it with a towel and let it rest for about 30 minutes. This will help develop texture.
Step 5: Shape the Pitas
Preheat your oven to 450°F (230°C). Divide the dough into equal portions. Roll each piece into round discs about 1/4 inch thick.
Step 6: Bake the Pitas
Place the rolled-out dough on a baking sheet lined with parchment paper. Bake for about 8–10 minutes or until they puff up and turn lightly golden.
Now you’re ready to enjoy your delicious homemade gluten-free pita bread!
How to Serve Gluten-Free Pita Bread
Gluten-free pita bread is versatile and can elevate any meal. Whether you enjoy it warm, fresh from the oven, or as part of a larger spread, there are countless ways to serve this delightful flatbread.
With Dips
- Hummus: This classic Mediterranean dip pairs perfectly with gluten-free pita. Spread or scoop for a tasty snack.
- Baba Ganoush: A smoky eggplant dip that complements the fluffy texture of pita bread beautifully.
- Tzatziki: This refreshing yogurt-based dip adds a cool contrast to warm pita.
As Sandwiches
- Falafel Wraps: Stuff your pita with falafel, veggies, and tahini sauce for a delicious vegetarian option.
- Grilled Chicken: Fill your pita with grilled chicken, lettuce, and your favorite dressing for a quick lunch.
- Mediterranean Veggies: Load up on roasted vegetables and feta cheese for a hearty plant-based meal.
With Salads
- Greek Salad: Tear pieces of gluten-free pita into your salad for added texture and substance.
- Tabbouleh: Pair with this fresh parsley salad for a light and healthy dish.
How to Perfect Gluten-Free Pita Bread
Making gluten-free pita bread can be simple if you follow these tips. These small adjustments can ensure your bread turns out just right every time.
- Use Warm Water: Ensure the water is warm but not hot. This helps activate the yeast properly.
- Check Yeast Freshness: Always use fresh yeast for the best rise in your pita. Expired yeast can lead to flat bread.
- Knead Gently: Knead the dough gently until it’s smooth; over-kneading can lead to tough pita.
- Rest Dough Properly: Allow your dough to rest for the recommended time so it can rise and develop flavor.
- Preheat Your Oven: Ensure that your oven is fully preheated before baking for an even puff and golden color.
Best Side Dishes for Gluten-Free Pita Bread
Gluten-free pita bread pairs well with a variety of side dishes that complement its flavor and texture. Here are some great options to consider:
- Roasted Vegetables: Seasonal veggies roasted until tender make a flavorful side that balances the softness of the bread.
- Chickpea Salad: A protein-packed salad featuring chickpeas, bell peppers, and herbs offers freshness alongside your pita.
- Stuffed Grape Leaves: These savory bites provide a unique taste experience when enjoyed with gluten-free pita bread.
- Spicy Lentil Soup: A warm bowl of lentil soup adds heartiness and spice, perfect for dipping your pita.
- Cucumber Salad: Light and refreshing, this salad provides crunch that contrasts nicely with the soft bread.
- Tabbouleh Salad: This herby bulgur salad (swap bulgur for quinoa) brings a burst of flavor to each bite of pita.
Common Mistakes to Avoid
Making gluten-free pita bread can be simple, but there are common pitfalls to watch for.
- Wrong Yeast Usage: Using dry yeast instead of fresh yeast can lead to a flat result. Always check your recipe before starting.
- Ignoring Flour Types: Not using the right combination of flours may affect texture. Stick to rice and tapioca flour for best results.
- Water Temperature Mistakes: Water that is too hot can kill the yeast. Ensure it’s warm, not boiling.
- Overmixing the Dough: Overworking the dough can make it tough. Mix just until combined for a tender pita.
- Insufficient Resting Time: Skipping the resting period will prevent proper rising. Allow the dough to rest for fluffy pita bread.
Storage & Reheating Instructions
Refrigerator Storage
- Store in an airtight container for up to 3 days. This keeps them fresh and prevents drying out.
- If you have leftover pita bread, separate layers with parchment paper to avoid sticking.
Freezing Gluten-Free Pita Bread
- Wrap each piece tightly in plastic wrap, then place in a freezer bag. They can be frozen for up to 3 months.
- Label the bags with the date so you know when to use them by.
Reheating Gluten-Free Pita Bread
- Oven: Preheat to 350°F (175°C). Wrap in foil and heat for about 10 minutes for a soft texture.
- Microwave: Place on a microwave-safe plate, cover with a damp paper towel, and heat for 15-20 seconds for quick warming.
- Stovetop: Heat in a dry skillet over medium heat for about 1 minute on each side to restore softness and warmth.
Frequently Asked Questions
Here are some common questions about gluten-free pita bread that might help clarify any doubts.
What makes this Gluten-Free Pita Bread fluffy?
The combination of psyllium husk powder and the right flours creates a light texture that mimics traditional pita bread.
Can I make this recipe vegan?
Yes! This gluten-free pita bread recipe is naturally vegan as it does not contain any dairy or eggs.
How do I know if my yeast is active?
To test yeast activity, mix it with warm water and sugar. If it bubbles after a few minutes, it’s active and ready to use!
Can I substitute other flours?
You can experiment with other gluten-free flours, but keep in mind that results may vary based on their properties.
Is Gluten-Free Pita Bread healthy?
This pita bread is low in calories and made from wholesome ingredients, making it a healthy option compared to many store-bought varieties.
Final Thoughts
This gluten-free pita bread recipe not only delivers delightful flavor and texture but also offers versatility. You can customize it with herbs or spices to suit your taste! Enjoy making this easy flatbread at home; you’ll never want store-bought again!
Gluten-Free Pita Bread
Gluten-Free Pita Bread is a game-changer for anyone craving soft, fluffy flatbreads without the gluten. This easy recipe is perfect for wraps, dips, or as a delightful side to your favorite Mediterranean dishes. With just a few simple ingredients and minimal effort, you can create homemade pita that rivals store-bought versions. Ideal for family meals, casual gatherings, or special occasions, this pita bread is sure to impress guests and satisfy cravings alike.
- Prep Time: 15 minutes
- Cook Time: 10 minutes
- Total Time: 25 minutes
- Yield: Approximately 8 servings 1x
- Category: Bread
- Method: Baking
- Cuisine: Mediterranean
Ingredients
- 3/4 cup + 2 tbsp warm water
- 10 g fresh yeast
- 1 1/2 tsp organic cane sugar
- 1 cup white rice flour
- 2/3 cup tapioca flour
- 2 tsp psyllium husk powder
- 1/2 tsp salt
- 2 tsp oil
Instructions
- Activate the yeast by combining warm water with yeast and sugar; let it sit until frothy (5–10 minutes).
- In another bowl, mix rice flour, tapioca flour, psyllium husk powder, and salt.
- Combine the frothy yeast mixture with dry ingredients and oil; stir until a sticky dough forms.
- Knead gently on a floured surface for 1–2 minutes. Cover and let it rest for 30 minutes.
- Preheat your oven to 450°F (230°C). Divide the dough into portions and roll into discs (1/4 inch thick).
- Place on a baking sheet lined with parchment paper and bake for 8–10 minutes until puffed and lightly golden.
Nutrition
- Serving Size: 1 pita (approx. 50g)
- Calories: 130
- Sugar: 0g
- Sodium: 120mg
- Fat: 4g
- Saturated Fat: 0g
- Unsaturated Fat: 3g
- Trans Fat: 0g
- Carbohydrates: 23g
- Fiber: 3g
- Protein: 3g
- Cholesterol: 0mg