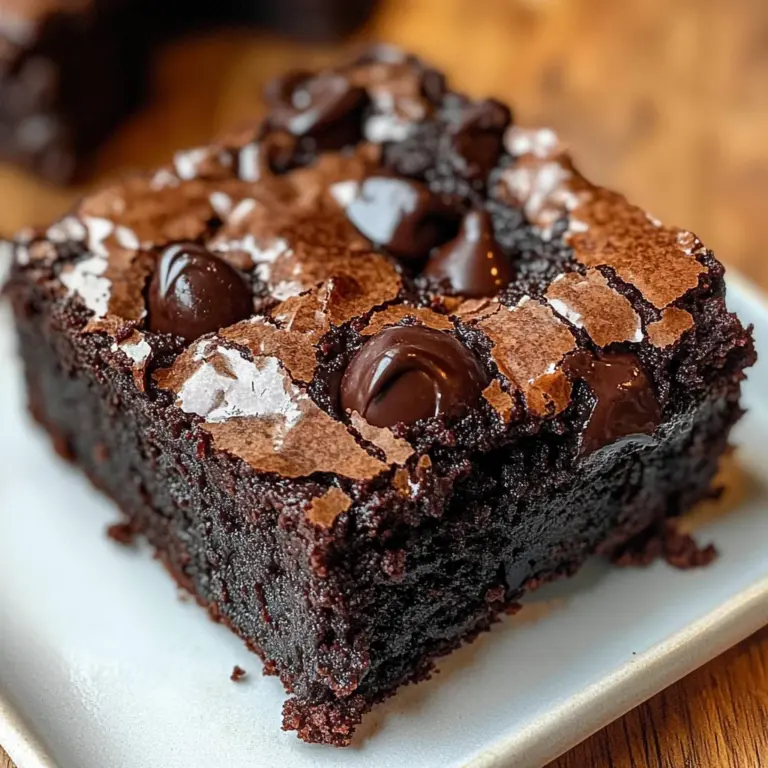
“Little Debbie” Brownies
These Little Debbie Brownies are a delightful treat that brings back childhood memories of indulging in sweet, chocolatey goodness. With their rich, fudgy texture and smooth chocolate topping, these brownies are not only delicious but also gluten-free! Perfect for parties, family gatherings, or a cozy night in, these brownies will satisfy your sweet tooth without any guilt.
Why You’ll Love This Recipe
- Gluten-Free Delight: Enjoy the classic taste of Little Debbie brownies without the gluten. These brownies use gluten-free flour to cater to all dietary needs.
- Easy to Make: With straightforward steps and common ingredients, anyone can whip up these brownies in no time.
- Rich Flavor: The combination of cocoa powder and semi-sweet chocolate delivers a deep, indulgent flavor that’s hard to resist.
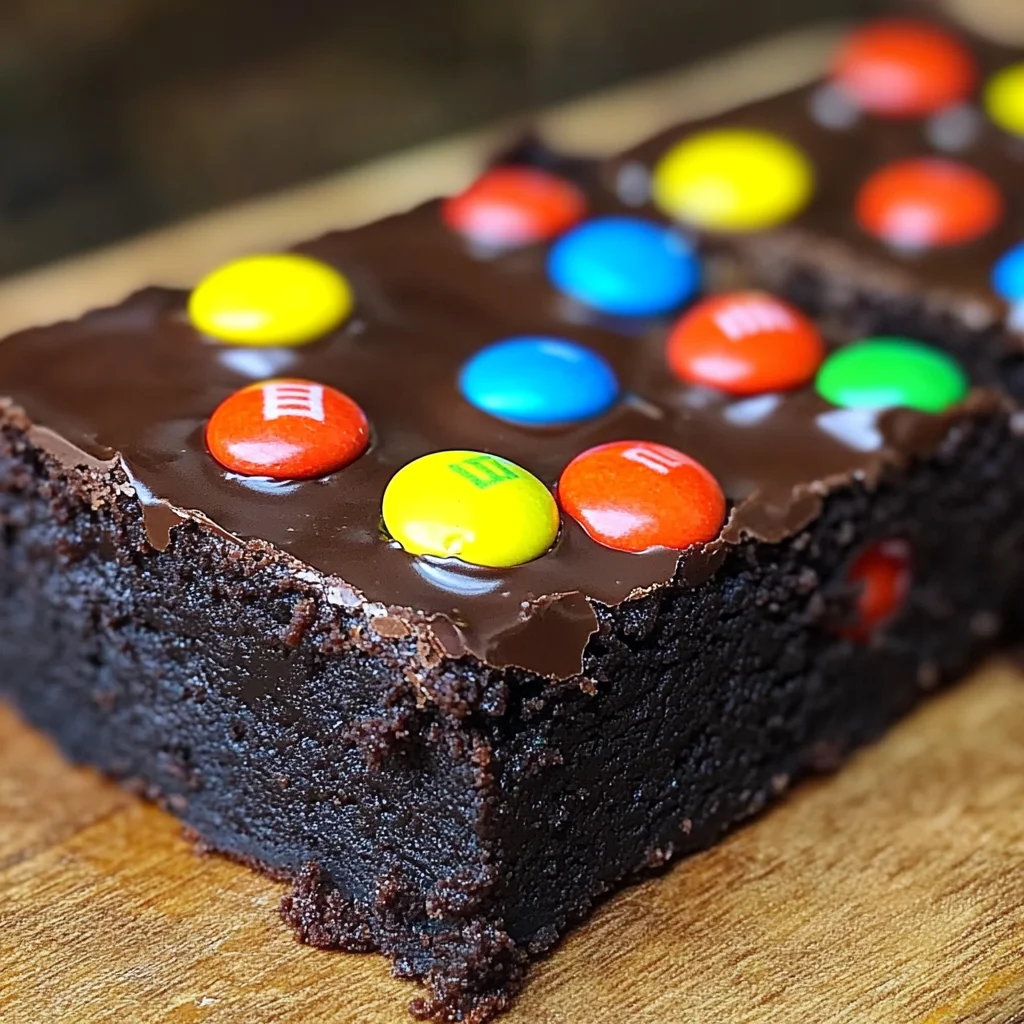
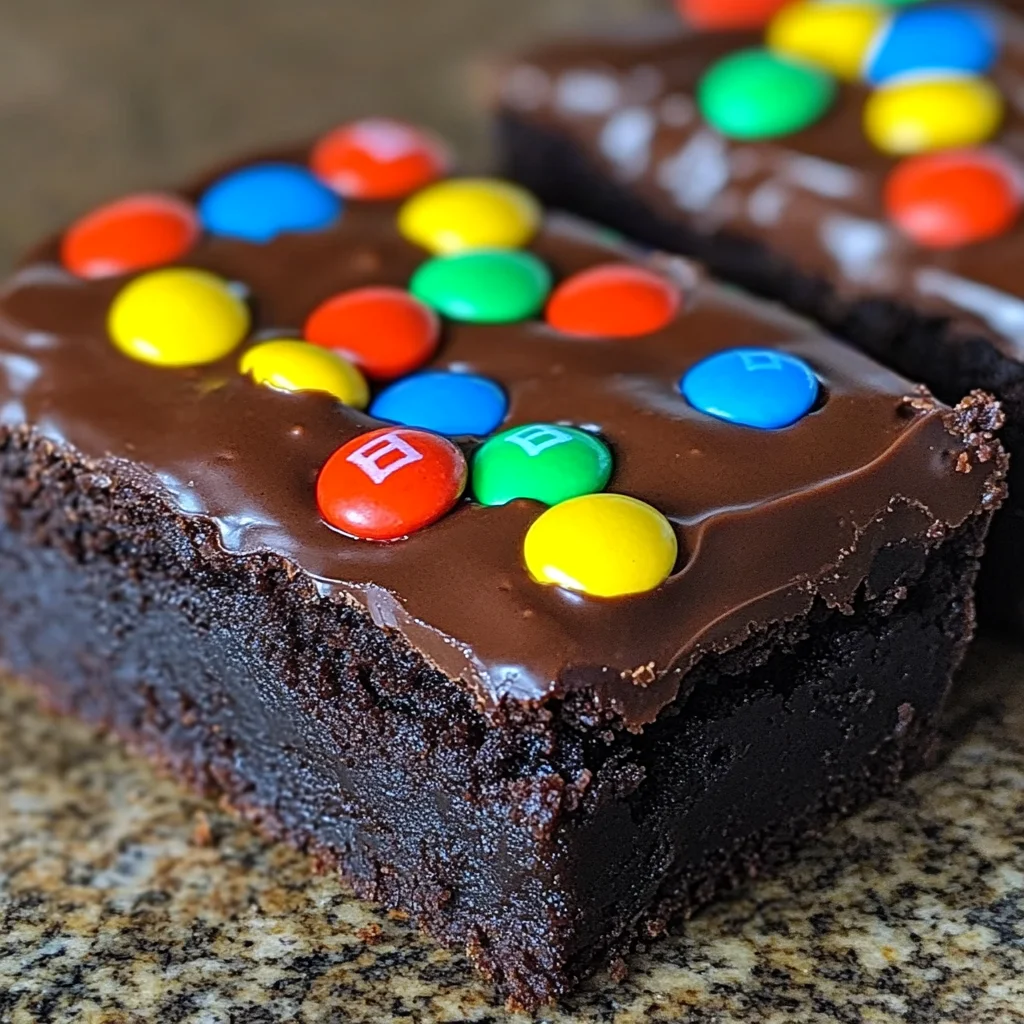
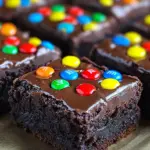
- Versatile Topping Options: Add some fun with optional M&Ms or Sixlets on top for a colorful twist!
- Perfect for Everyone: These brownies are great for kids and adults alike, making them an ideal dessert for any gathering.
Tools and Preparation
To make your baking experience seamless, gather the necessary tools before you start. Proper equipment ensures that your Little Debbie Brownies come out perfectly every time.
Essential Tools and Equipment
- Mixing bowls
- Whisk
- Measuring cups
- Baking pan (9×13 inches)
- Parchment paper
- Rubber spatula
Importance of Each Tool
- Mixing bowls: Essential for combining ingredients evenly and ensuring a smooth batter.
- Baking pan: A good quality pan helps distribute heat evenly, resulting in perfectly baked brownies.
- Parchment paper: Using parchment makes it easy to lift the brownies out after baking without sticking.
Ingredients
These rich, fudgy brownies with the thick but smooth chocolate top taste just like Little Debbies, but they’re gluten free!
For the Brownie Base
- 1 cup all purpose gluten free flour (please click thru for info on appropriate blends)
- 1/2 teaspoon xanthan gum (omit if your blend already contains it)
- 3/4 cup unsweetened cocoa powder (See Recipe Notes)
- 1/8 teaspoon kosher salt
- 3/4 cup granulated sugar
- 1/2 cup packed light brown sugar
- 8 tablespoons unsalted butter (at room temperature)
- 2 tablespoons neutral oil (like vegetable, canola or peanut oil)
- 2 teaspoons pure vanilla extract
- 2 tablespoons light corn syrup
- 2 eggs (at room temperature, beaten)
For the Chocolate Topping
- 8 ounces semi-sweet chocolate (chopped)
- 2/3 cup heavy whipping cream
- 1/8 teaspoon kosher salt
For Decorating (Optional)
- 3 ounces miniature M&Ms candies or multicolored Sixlets
How to Make Little Debbie Brownies
Step 1: Preheat the Oven
Preheat your oven to 350°F (175°C). This ensures the brownies bake evenly.
Step 2: Prepare Your Baking Pan
Line a 9×13 inch baking pan with parchment paper. Leave some overhang on the sides for easy removal after baking.
Step 3: Mix Dry Ingredients
In a mixing bowl, combine:
1. Gluten free flour
2. Xanthan gum (if using)
3. Cocoa powder
4. Kosher salt
Whisk these ingredients together until well blended.
Step 4: Cream Butter and Sugars
In another bowl, beat together:
1. Unsalted butter
2. Granulated sugar
3. Light brown sugar
Mix until creamy and smooth.
Step 5: Add Wet Ingredients
To the butter and sugar mixture, add:
1. Neutral oil
2. Vanilla extract
3. Light corn syrup
4. Beaten eggs
Stir until fully combined.
Step 6: Combine Mixtures
Gradually add dry ingredients into the wet mix. Stir until just combined; do not overmix.
Step 7: Bake Brownies
Pour the brownie batter into the prepared pan and spread it evenly. Bake in preheated oven for about 28 minutes or until a toothpick comes out with a few moist crumbs.
Step 8: Prepare Chocolate Topping
While brownies bake, heat heavy whipping cream in a saucepan until simmering. Pour over chopped semi-sweet chocolate in a bowl and let sit for a few minutes before stirring until smooth.
Step 9: Assemble Brownies
Once baked brownies are cooled slightly, pour chocolate topping over them and spread evenly with a spatula. If desired, sprinkle miniature M&Ms or Sixlets on top before it sets.
Enjoy your homemade Little Debbie Brownies!
How to Serve Little Debbie Brownies
These delightful Little Debbie brownies are perfect for any occasion, whether you’re hosting a party or enjoying a cozy evening at home. Here are some creative ways to serve them to elevate your dessert experience.
With Ice Cream
- Add a scoop of vanilla or chocolate ice cream on top of warm brownies for a classic combination that is hard to resist.
Drizzled with Caramel Sauce
- A drizzle of warm caramel sauce adds a sweet touch, enhancing the rich chocolate flavor of the brownies.
Topped with Whipped Cream
- Light and fluffy whipped cream makes for a great topping, adding a contrasting texture and balancing the fudginess.
Served with Fresh Berries
- Fresh strawberries, raspberries, or blueberries can add a burst of freshness that pairs beautifully with the rich brownies.
Sliced into Brownie Sundaes
- Create brownie sundaes by layering brownie pieces with ice cream, sauce, and toppings in a glass for an eye-catching dessert.
Decorated with Mini M&Ms
- For a fun twist, sprinkle some miniature M&Ms on top before serving. They add color and crunch!
How to Perfect Little Debbie Brownies
Achieving the perfect Little Debbie brownies requires attention to detail. Here are some tips to ensure your brownies turn out delicious every time.
-
Use Quality Chocolate: Choose high-quality semi-sweet chocolate for melting. It significantly impacts the flavor and texture of your brownies.
-
Measure Ingredients Accurately: Precision is key in baking. Use measuring cups and spoons for accurate measurements to avoid altering the brownie’s consistency.
-
Don’t Overmix the Batter: Mix until just combined to maintain a fudgy texture. Overmixing can result in cakey brownies instead of the desired fudgy ones.
-
Check for Doneness Early: Start checking your brownies a few minutes before the recommended baking time. They should be set but still slightly soft in the center when done.
-
Let Them Cool Completely: Allow your brownies to cool completely in the pan before cutting. This helps them firm up and makes slicing easier.
-
Store Properly: Keep leftover brownies covered at room temperature or in the refrigerator to maintain freshness.
Best Side Dishes for Little Debbie Brownies
Pairing side dishes with Little Debbie brownies can enhance your dessert experience. Here are some ideas to consider:
-
Fresh Fruit Salad
A mix of seasonal fruits provides a refreshing contrast to the rich chocolate flavor of the brownies. -
Chocolate Milkshake
Indulge in a creamy chocolate milkshake that complements the brownie’s taste perfectly. -
Vanilla Yogurt Parfait
Layer vanilla yogurt with granola and berries for a light yet satisfying accompaniment. -
Coffee or Espresso
A cup of strong coffee or espresso balances sweetness while enhancing chocolate flavors in the brownies. -
Peanut Butter Ice Cream
The nutty flavor of peanut butter ice cream pairs wonderfully with chocolate desserts like these brownies. -
Candied Nuts
Crunchy, sweet candied nuts provide texture and contrast when served alongside fudgy brownies. -
Homemade Hot Fudge Sauce
Pouring warm hot fudge over your brownies takes them to another level of indulgence! -
Mint Tea or Peppermint Hot Chocolate
Both mint tea and peppermint hot chocolate offer refreshing flavors that complement rich desserts well.
Common Mistakes to Avoid
Baking can be tricky, especially when trying to recreate that nostalgic taste of Little Debbie Brownies. Here are some common mistakes to watch out for.
- Using the wrong flour: Not all gluten-free flours are the same. Make sure to choose a blend that works well for brownies to ensure the perfect texture.
- Skipping room temperature ingredients: Using cold eggs or butter can affect how the batter comes together, leading to dense brownies. Always use room temperature ingredients for best results.
- Overmixing the batter: Mixing too much can lead to tough brownies. Stir until just combined for that fudgy texture you’re looking for.
- Not measuring accurately: Baking is a science, so precise measurements are crucial. Use a kitchen scale or measuring cups carefully to avoid inconsistencies.
- Ignoring baking time: Every oven is different. Keep an eye on your brownies and do the toothpick test a few minutes before the suggested bake time.
Storage & Reheating Instructions
Refrigerator Storage
- Store brownies in an airtight container for up to 5 days.
- Use parchment paper between layers if stacking, to prevent sticking.
Freezing Little Debbie Brownies
- Wrap individual brownies tightly in plastic wrap and place them in a freezer-safe bag.
- They can last up to 3 months in the freezer without losing flavor.
Reheating Little Debbie Brownies
- Oven: Preheat to 350°F (175°C) and warm brownies for about 10 minutes.
- Microwave: Heat on medium power for 20-30 seconds, checking frequently.
- Stovetop: Place in a skillet on low heat with a lid, heating gently until warm.
Frequently Asked Questions
Here are some common questions about making these delicious Little Debbie Brownies.
Can I make these brownies dairy-free?
Yes! Substitute butter with coconut oil or a dairy-free margarine, and use dairy-free chocolate options.
How do I customize my Little Debbie Brownies?
You can add nuts, chocolate chips, or even swirl in some peanut butter for extra flavor!
What should I do if my brownies turn out too dry?
Make sure not to overbake them. You can also add a bit of milk or cream when mixing next time for richer moisture.
Are Little Debbie Brownies suitable for kids?
Absolutely! These brownies are fun and kid-friendly with their rich taste and colorful toppings.
How long do Little Debbie Brownies last?
Stored properly, they can stay fresh in the fridge for about 5 days or freeze well for up to 3 months.
Final Thoughts
These delightful Little Debbie Brownies bring comfort and nostalgia straight from your childhood. With their rich flavors and fudgy texture, they are versatile enough to suit any occasion. Feel free to experiment with toppings or mix-ins to make them uniquely yours!
“Little Debbie” Brownies
Indulge in the rich, fudgy goodness of “Little Debbie” Brownies, a nostalgic treat that brings back childhood memories. These gluten-free delights are not only easy to make but also perfect for any occasion—be it a family gathering or a cozy night in. With a smooth chocolate topping and the option to add colorful M&Ms, these brownies are sure to satisfy your sweet tooth without any guilt. Treat yourself and your loved ones to these decadent chocolate squares that combine simplicity with a deliciously indulgent experience.
- Prep Time: 15 minutes
- Cook Time: 28 minutes
- Total Time: 43 minutes
- Yield: Approximately 12 servings 1x
- Category: Dessert
- Method: Baking
- Cuisine: American
Ingredients
- 1 cup gluten-free all-purpose flour
- 1/2 teaspoon xanthan gum
- 3/4 cup unsweetened cocoa powder
- 1/8 teaspoon kosher salt
- 3/4 cup granulated sugar
- 1/2 cup packed light brown sugar
- 8 tablespoons unsalted butter (room temperature)
- 2 tablespoons neutral oil
- 2 teaspoons pure vanilla extract
- 2 tablespoons light corn syrup
- 2 eggs (room temperature, beaten)
- 8 ounces semi-sweet chocolate (chopped)
- 2/3 cup heavy whipping cream
- 1/8 teaspoon kosher salt
- 3 ounces miniature M&Ms candies or multicolored Sixlets (optional)
Instructions
- Preheat your oven to 350°F (175°C) and line a 9×13 inch baking pan with parchment paper.
- In one bowl, whisk together gluten-free flour, cocoa powder, and salt. In another bowl, cream butter with granulated and brown sugars until smooth.
- Mix in eggs and vanilla extract into the butter mixture. Gradually combine dry ingredients with the wet mixture until just incorporated.
- Pour the brownie batter into the prepared pan and bake for about 28 minutes or until a toothpick comes out with moist crumbs.
- For the topping, heat heavy cream until simmering, pour over chopped chocolate, let sit, then stir until smooth.
- Once brownies cool slightly, spread the chocolate topping evenly on top.
Nutrition
- Serving Size: 1 serving
- Calories: 210
- Sugar: 19g
- Sodium: 150mg
- Fat: 12g
- Saturated Fat: 7g
- Unsaturated Fat: 4g
- Trans Fat: 0g
- Carbohydrates: 24g
- Fiber: 2g
- Protein: 3g
- Cholesterol: 30mg